Wordpress Documentation
Oval-SaaS-2 Wordpress Theme
Thank you for purchasing our theme!
Please take the time to read this documentation before use our theme.
Preparation
The first step starts with theme installation until the theme is ready to be live.
Installation - Preparation
The first, login to your site admin page, and then go to Appearance ➜ Themes. To add new themes, click on the Add New button.

In the next step you have to click Upload Theme button. Choose the *.zip package which you have from your local hard drive and click Install Now.

After the theme is successfully installed, make sure you have activated the theme.

Next step is installing and activating required plugins.
You will see a message and Click "Begin Installing Plugins", check all plugins, then apply "Install" on bulk actions.


When all installations have been completed click on "Return to Required Plugins Installer", then activate all installed plugins.


Importing Demo Content - Preparation
Go to Appearance ➜ Import Demo Data and click on the Import Demo Data button.

You will be directed to a page containing a list of required plugins.
Make sure all required plugins has been installed and click on the Continue & Import button once.

Selecting Front Page - Preparation
After successfully importing content, you will get several pages that are automatically created.
One of the important page is the homepage which can be set in Settings ➜ Reading.

Changing Logo & Icon - Preparation
By default the theme will displaying "Oval" logo in the nav header.
You can upload your logo from Appearance ➜ Customize ➜ Site Identity.
You can also change the site icon (favicon) that appears in the address bar of the web page.
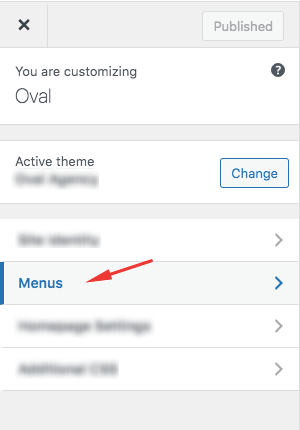
You can updating menus from Appearance ➜ Menus page
or via the live preview customizer on Appearance ➜ Customize ➜ Menus ➜ Oval Main Menu.
In this early version Oval does not support multilevel dropdown menus.


For more information about WordPress menus, please read the WordPress menu guide
You can customize footer from Appearance ➜ Footer Settings page.
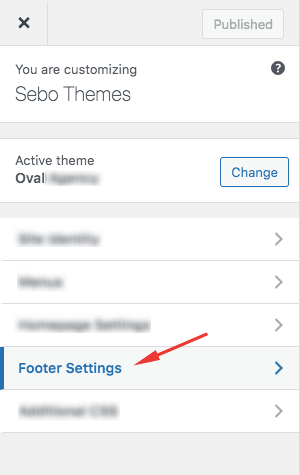
The footer section has 5 settings : Column 1, Column 2, Column 3, Column 4, and Column 5.
